

Choose tiles room by room. Start with what the surface needs to do, then compare materials, finishes and layouts. A polished marble-look wall and a shower floor can share a colour without sharing the same tile finish.
For an easy-care stone look, shortlist porcelain and compare several pieces for repeating patterns. If you prefer real stone, choose where you’ll appreciate its natural variation and check the cleaning and sealing routine before you buy.
01. Compare ceramic, porcelain and natural stone
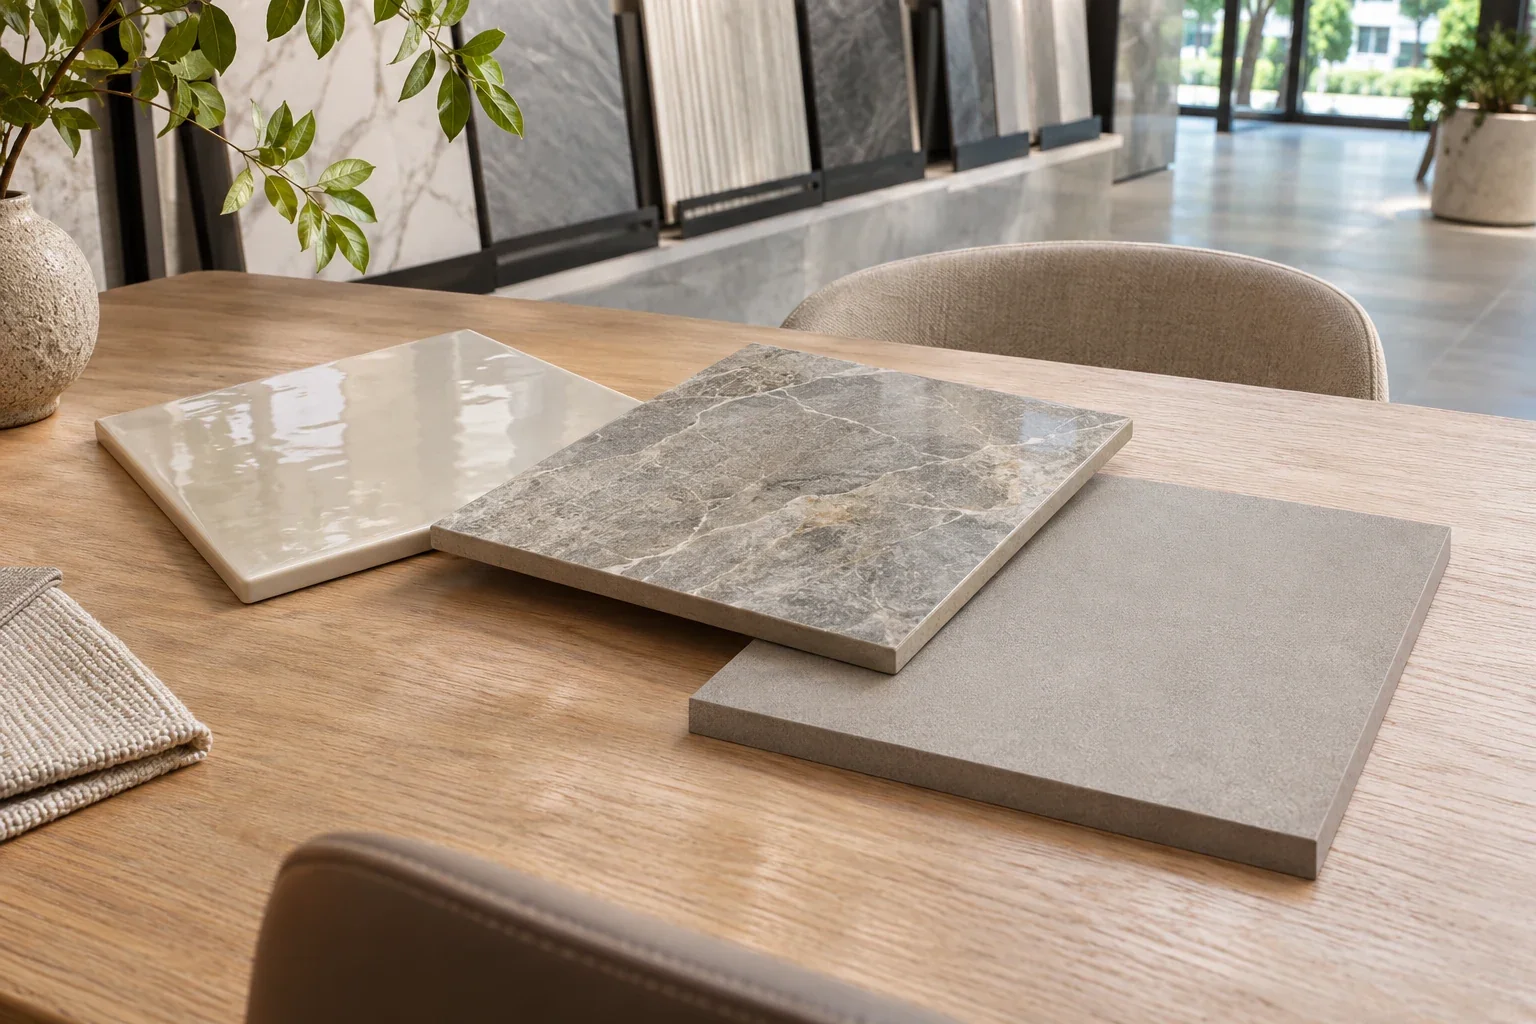
Porcelain is a type of ceramic tile with low water absorption. It can be glazed or unglazed. In Singapore, “homogeneous” often refers to full-body porcelain, where a similar body colour can make a small chip less conspicuous. Ask to see the cut edge. A matching body colour does not guarantee that the printed face pattern continues through the tile.
| Tile or stone | What it’s made of | Scratches, wear and chips | Water, upkeep and where to use it |
|---|---|---|---|
| Glazed ceramic (non-porcelain) | Fired ceramic body with a glazed face. The body is typically more absorbent than porcelain. | The glaze determines surface wear. A chip can expose a different body colour. Choose a floor-rated glaze for foot traffic. | The glazed face is easy to wipe. A practical choice for bathroom walls and backsplashes. |
| Glazed porcelain | Dense, low-absorption ceramic body with a glazed face. | A dense body can still chip. Scratch and wear performance depend on the glaze. Check the surface abrasion rating for a glazed floor tile. | Useful for stone- or timber-look walls and floors. Check wet grip for floors and compare several tiles for print repetition. |
| Full-body porcelain | Dense porcelain with colour running through the body. Check whether the face is glazed. | A similar body colour can make chips less visible. For an unglazed tile, ask for deep abrasion data if wear is a priority. | Useful for busy floors or visible cut edges. Check grip and stain resistance for the exact finish. |
| Mosaic | Small pieces of ceramic, porcelain, glass or stone, often supplied on sheets. | Hardness and scratch resistance depend on the material. The small format itself does not determine wear. | Useful for niches and suitable shower floors. Check wet grip, backing compatibility and the upkeep of extra grout joints. |
| Granite | Natural stone typically containing quartz and feldspar. | Generally more scratch-resistant than marble or travertine. Edges can still chip and polished surfaces can show wear. | Absorption varies by stone. For entrances or floors, check the finish’s wet grip and ask whether sealing is needed. |
| Marble | Natural stone commonly rich in calcite, or sometimes dolomite. | Usually scratches more readily than granite. Lemon juice and acidic cleaners can leave dull etched marks. | Absorption varies. Consider it for feature walls or areas where you can follow the stone’s cleaning and sealing guidance. |
| Travertine | Calcite-rich limestone with natural pits that can be left open or filled. | Generally softer than granite and susceptible to scratches and acid etching. Ask how the filler is maintained. | Open pits can trap dirt. For feature areas, check whether it is filled and what cleaning and sealing it needs. |
Hardness, wear and chipping measure different things. Mohs hardness compares resistance to scratching. Calcite is 3 and quartz is 7 on that scale. Those numbers describe minerals. For a finished tile or stone, compare the actual surface and product data. Abrasion is gradual wear from repeated contact, such as grit under shoes. An impact can chip an edge even on a hard material. Acid etching is a chemical reaction that can dull marble or travertine, including when the stone has been sealed. U.S. National Park Service guide to Mohs hardness.
Mosaic describes a format, so the pieces can be ceramic, porcelain, glass or stone. If you like marble’s veining with a simpler cleaning routine, compare a glazed marble-look tile with real stone under the same lighting. For natural stone, ask to see several pieces and discuss how the veining will be arranged. BCA’s natural stone finishes guide.
02. Choose the shower floor for wet grip and drainage
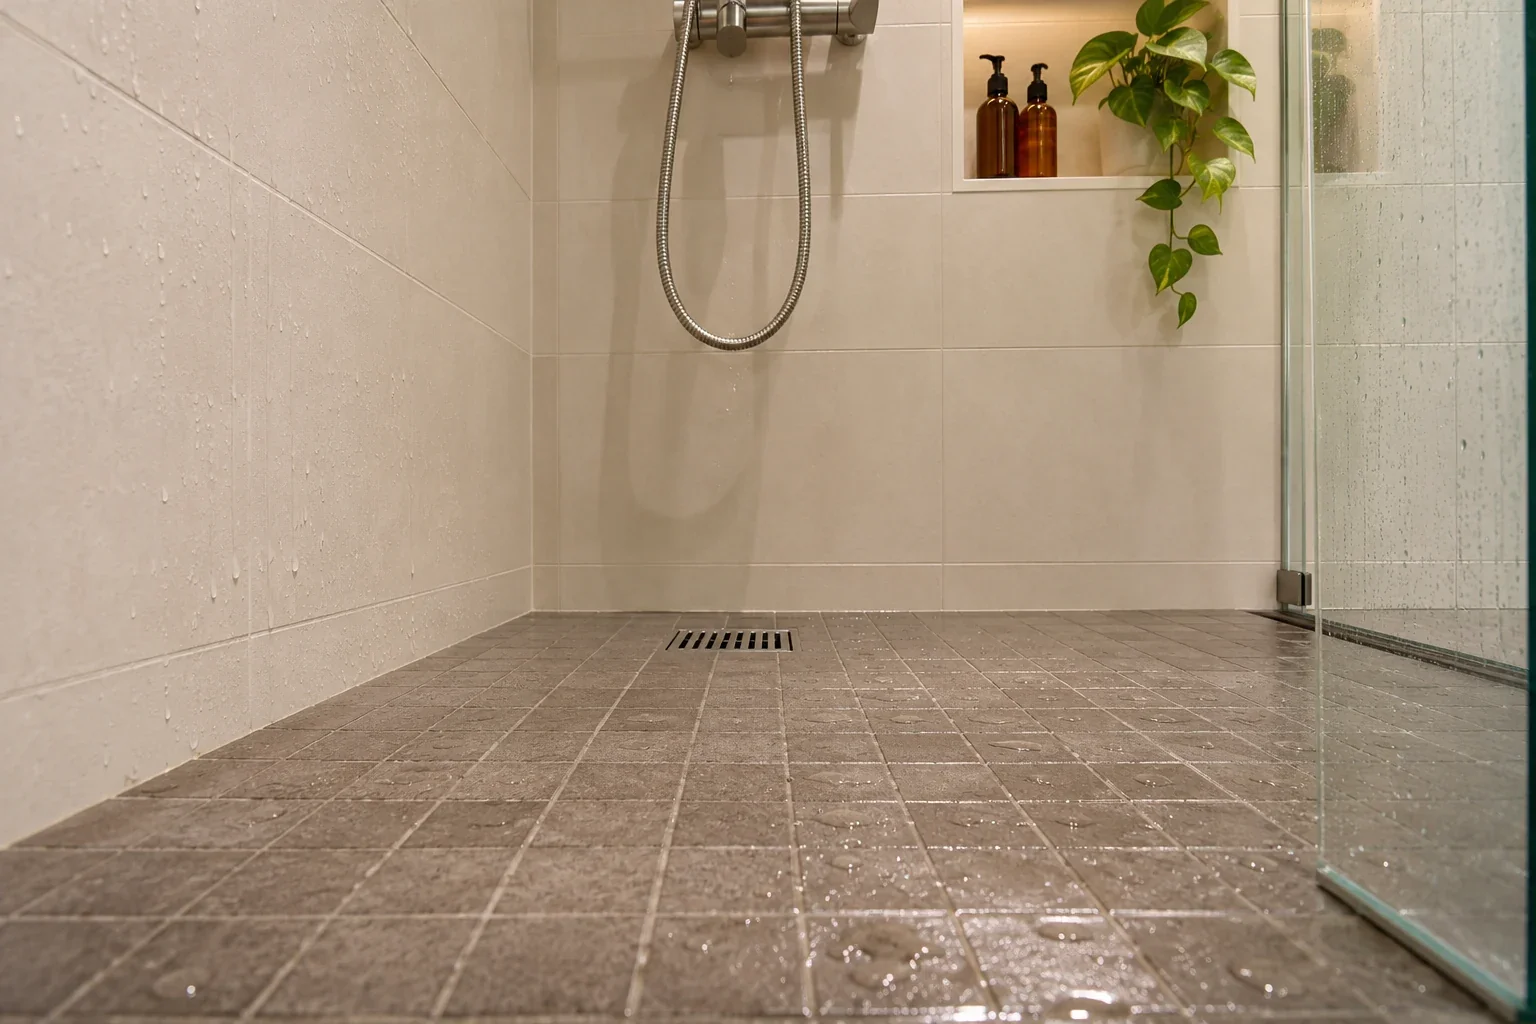
Ask for slip-resistance test information for the exact finish and check whether it suits wet barefoot use. “Matte” and “textured” describe how a surface looks or feels. Use the product’s test information to assess grip. Check how easily the sample releases soap residue too, especially if the texture is pronounced.
Smaller tiles can follow the falls around a point drain, but add grout joints to clean. Larger tiles may work if the tiler can achieve the required falls with the chosen drain position and cuts. Ask to see the layout around the floor trap, shower screen and threshold. Low water absorption is a tile property. The wet area still needs its specified waterproofing underneath. BCA’s ceramic tiling guide.
03. Match the finish to the kitchen, service yard or balcony
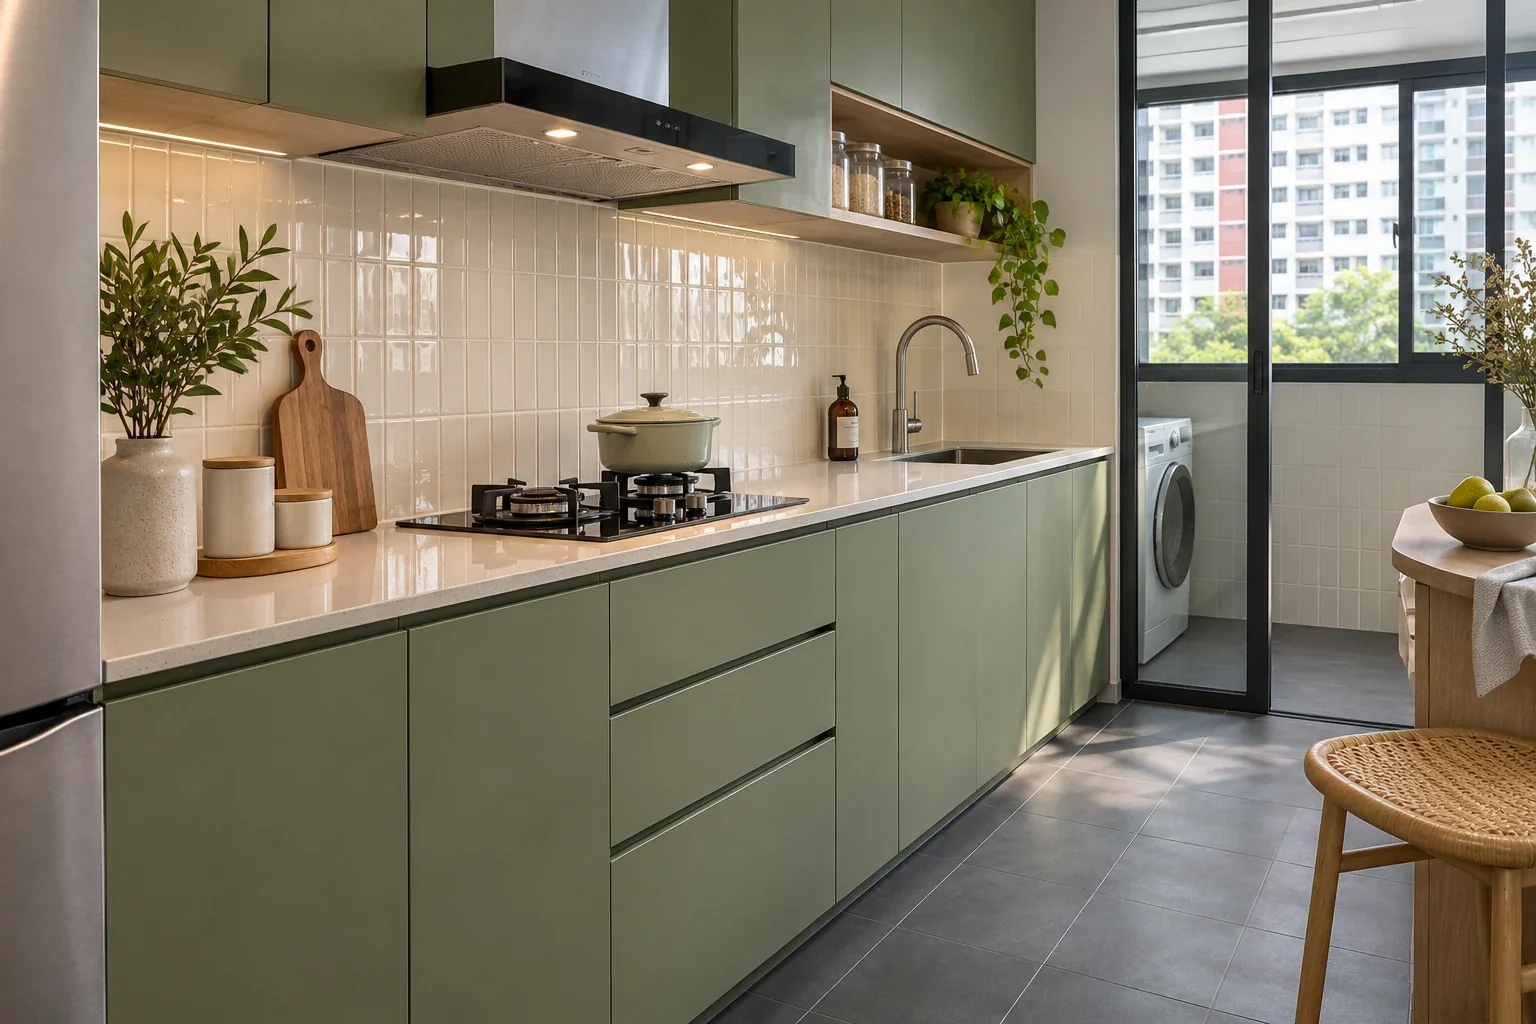
Behind the hob or sink, a smooth glazed tile is easy to wipe. A high-gloss wall tile reflects more light and may also show water marks or fingerprints. Keep deep textures for a feature wall away from grease and splashes if easy cleaning is a priority.
On kitchen and service yard floors, choose a floor-rated finish with grip suited to likely spills. For an exposed balcony, ask if the exact tile is suitable outdoors and when wet. Bring home a sample where possible. Try it next to your cabinetry, and check whether everyday marks like dust or dried splashes stand out against its colour.
04. Choose the tile size and pattern together
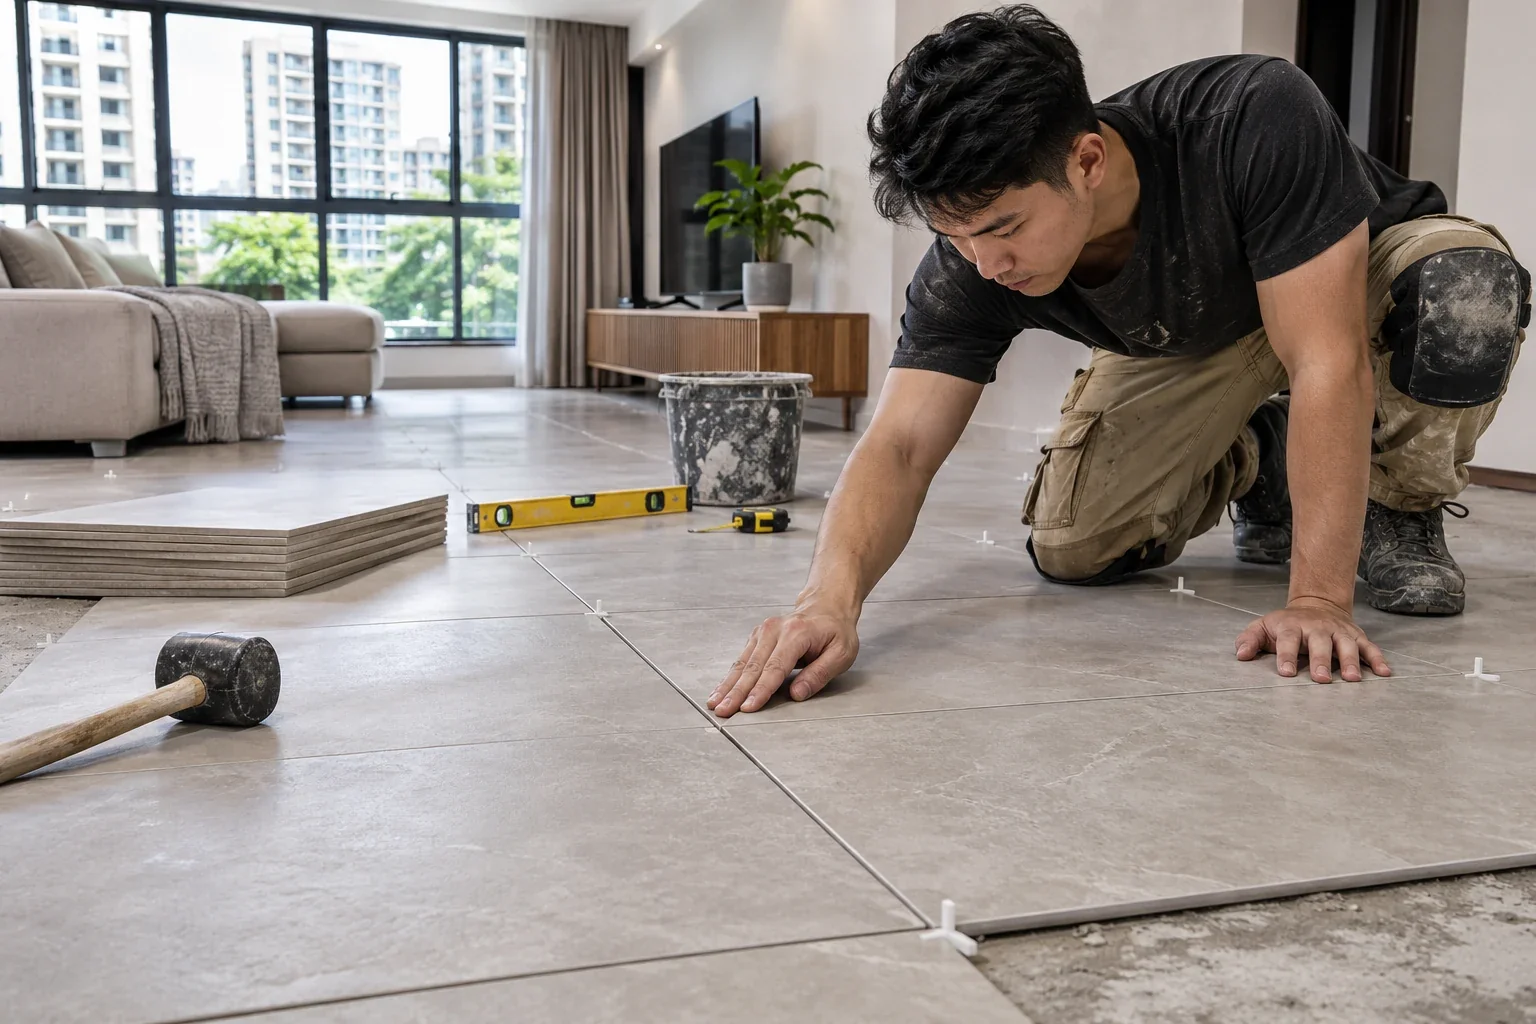
Large-format tiles reduce the number of joints and can carry a simple pattern through an open-plan room. They need a suitably flat base and more care in handling. Ask for a dry layout or drawing showing the starting point, cuts at the walls, and where grout lines land at doorways. Confirm the joint width even with rectified tiles, whose edges are machined to more consistent dimensions.
A straight lay keeps the layout simple. A diagonal pattern adds direction but can mean more perimeter cuts. Herringbone uses rectangular pieces, while chevron uses angled ends to form a continuous V. Both reward careful setting out. Ask how the pattern will finish at corners and how it affects labour and material quantities. For long rectangular tiles in a staggered pattern, confirm the recommended offset with the supplier and tiler.
05. Decide whether to retain, overlay or remove existing tiles

If the existing tiles are sound and only the joints look tired, ask whether cleaning or regrouting is enough. For an overlay, have the contractor inspect the base for loose tiles, cracks, dampness and uneven levels. Check the new height at doors, transitions and floor traps. Resolve leaks or drainage problems before covering the floor.
HDB restricts replacement of original bathroom or toilet wall and floor finishes for three years from block completion. Certain floor overlays are allowed under HDB’s conditions. Confirm what applies to your flat and proposed work before ordering tiles. If bathroom floor finishes are being replaced, check the waterproofing and water-test requirements with your contractor. HDB’s renovation requirements.
06. Approve samples, grout and the installed price

View the tile and a cured grout sample together under the room’s planned lighting. A close grout colour lets the tile pattern stand out, while contrast makes the grid more visible. Confirm the product code, finish, size and location. Ask about shade and calibre markings, which can indicate batch colour and size group, and keep spares from the same batch where possible.
Compare the installed price, including preparation, tile laying, grout, skirting, edge trims, disposal where needed and extra labour for complex patterns. Ask the tiler to calculate the allowance for cuts, breakage and future repairs from the actual layout. If you choose stone, get its care instructions and confirm whether the quote includes the recommended sealing.
Planning to re-tile your home? Share your floor plan and shortlisted samples with Formstill Studio so we can discuss the layout and installation scope before you order.
For information and reference only. The scope, methods and sequence for your renovation depend on actual site conditions, applicable requirements and the on-site assessment and professional judgement of the specialists carrying out the work.